Interior Painting Made Easy: Expert-Backed Best Practices
Interior painting might seem straightforward—a brush, a can of paint, and a weekend—but getting a polished, long-lasting finish involves much more. Homeowners often dive into interior painting projects with enthusiasm, only to find themselves frustrated by streaks, uneven coverage, or peeling paint within a few months. Success in painting comes down to proper preparation, smart product choices, and professional-level techniques. That’s where Alpha Painting LLC in Fredericksburg, VA, can make all the difference, offering precision and results that are tough to match with a DIY approach.
Table of Contents
Planning and Prep: The Foundation of Any Interior Job
Skipping prep is the fastest way to ruin a paint job. Professionals know that the finish is only as good as the surface underneath. Start by removing all wall hangings, outlet covers, and light switch plates. Furniture should be moved away from the walls or taken out of the room completely when possible. Once the room is cleared, the real prep begins.
Walls should be cleaned thoroughly to remove dust, oils, and any residue. Mild soap and water work for most walls, but high-traffic areas or kitchen walls might need a degreaser. After cleaning, inspect for damage. Holes, cracks, and nail pops should be patched using spackle or joint compound. Once the patches dry, sand them flush and dust the surface again. If there’s any gloss or semi-gloss paint on the walls, a light sanding will help the new coat adhere better.
Using painter’s tape to mask off baseboards, trim, windows, and ceilings ensures crisp edges. Press it down firmly to prevent bleed-through. Cover floors with drop cloths or plastic sheeting, not old bed sheets—they don’t stop paint from seeping through.
Priming: When It Matters and Why It Shouldn’t Be Skipped
Not every wall needs a primer, but knowing when to use it is key. If you’re covering dark paint with a lighter color, primer helps neutralize the base and reduces the number of coats needed. Newly repaired sections, bare drywall, or any surfaces with staining (like water marks or smoke damage) require primer for consistent color and sheen. Skipping primer in these situations leads to uneven finishes and visible patchwork.
There are primers available that also work as sealers and stain blockers, giving extra protection in areas prone to moisture or dirt. In bathrooms and kitchens, choosing a mold-resistant primer adds durability.
Choosing the Right Paint for the Room
Paint isn’t just about color. The finish and formulation are equally important. High-traffic rooms like hallways and kids’ bedrooms benefit from satin or semi-gloss finishes because they’re easier to clean. Flat or matte finishes, while stylish, tend to show marks more easily and are harder to wipe down.
Color selection plays a big role in how a room feels. Light shades tend to make spaces feel larger, while darker tones can add depth or coziness. Test swatches in different lighting before committing—natural light during the day and artificial light in the evening can change how a color looks.
Investing in high-quality paint pays off in fewer coats, better coverage, and longer life. Bargain paints may save money initially but often require more product and touch-ups down the road.
Professional Application Techniques for a Flawless Look
Once prep and priming are done, technique is everything. Start with the edges using an angled brush. Cutting in around trim, corners, and ceiling lines sets up clean borders before filling in the rest of the wall with a roller.
Use a roller with the right nap for your wall texture—short naps for smooth walls, longer naps for textured surfaces. Load the roller evenly and work in a “W” or “M” pattern to distribute paint without creating lines or ridges. Overlapping slightly and working in sections helps keep a wet edge, preventing visible seams once the paint dries.
Don’t rush the process. Allow adequate drying time between coats, and always follow the manufacturer’s recommendations on recoat timing. Applying a second coat too early can cause peeling or streaking.
Avoiding Common Mistakes That Undermine Results
Even with good prep, several mistakes can undercut the final appearance. Using cheap brushes or rollers often leads to shed bristles or fuzz embedded in the paint. Overloading the brush causes drips, while underloading results in streaks and uneven coverage.
Painting in extreme temperatures—too hot or too cold—interferes with how paint dries. Ideal indoor painting conditions are between 50°F and 85°F with low humidity. Open windows for ventilation but avoid fans that might blow dust onto wet surfaces.
Another overlooked issue is ignoring the paint can. Stir thoroughly before starting and during the process to maintain consistent color and texture. Separation is normal, especially with low-VOC or eco-friendly paints.
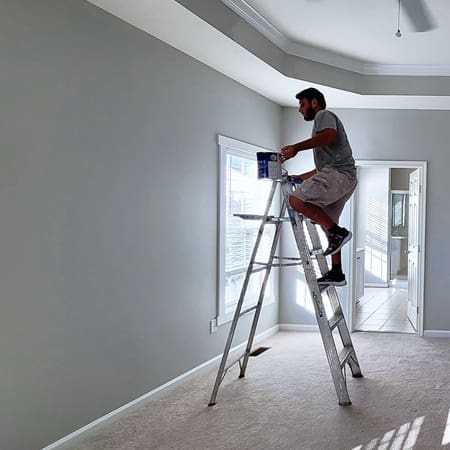
Knowing When to Bring in the Experts
Some rooms demand more than just time and patience. High ceilings, stairwells, textured walls, or detailed trim work call for experienced hands. Professional painters not only have the tools to handle these challenges, but they also bring an eye for detail that can elevate a space dramatically.
Whether you’re updating a single room or refreshing an entire home, getting expert help ensures the end result looks as good years down the line as it does the day it’s finished. Alpha Painting LLC provides top-tier interior painting services, backed by craftsmanship, clean execution, and surfaces that hold up beautifully to everyday life.
Wrapping Up with Clean-Up and Care Tips
Once the painting is done, peeling off the painter’s tape at a 45-degree angle while the paint is slightly wet gives the cleanest lines. If the paint has dried, score along the edge with a razor to avoid lifting any of the finish.
Clean brushes and rollers immediately after use to prolong their life. Latex paints wash out with water, but oil-based products require mineral spirits. Store leftover paint in a cool, dry place, tightly sealed. Label the can with the room and date for future touch-ups.
Let the paint cure properly before moving furniture back into place. Even when dry to the touch, it can take up to two weeks to fully harden, especially with darker colors or thicker coats. Taking the extra time ensures a flawless, lasting finish.
Interior painting doesn’t have to be overwhelming. With the right preparation, materials, and methods, transforming a room with paint becomes a satisfying, successful project.